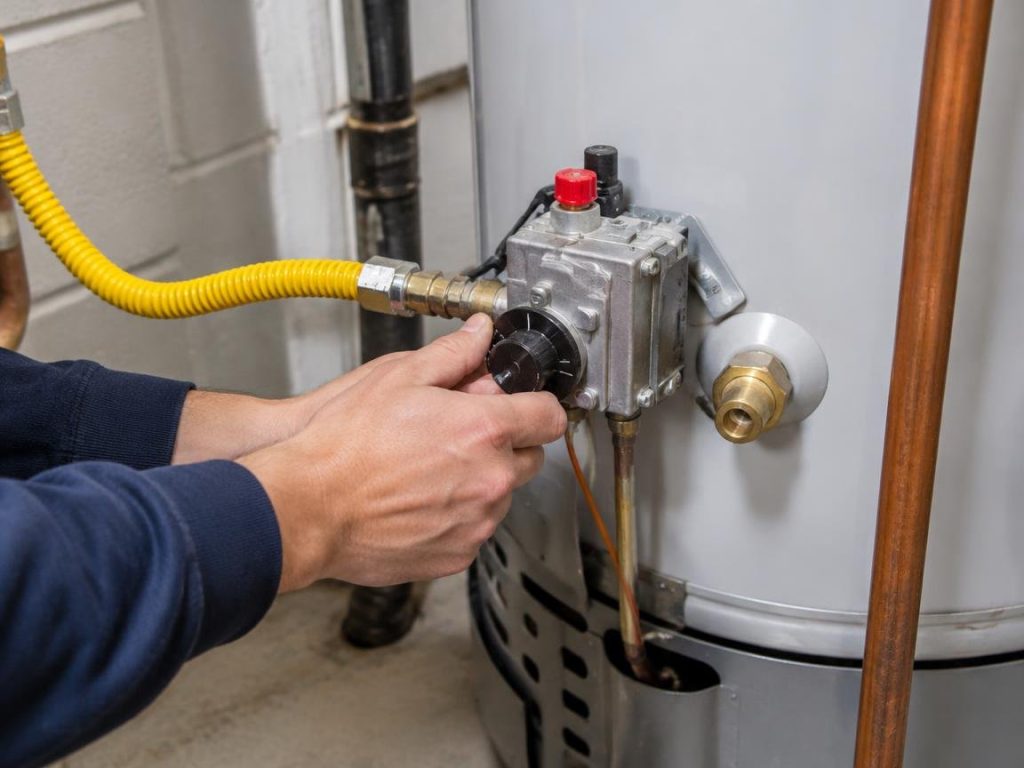

Critical Protocol for Emergency Plumbing Repairs on Water Heaters
When you first notice a hot water tank leak, rapid action is paramount. Your immediate response can significantly reduce potential property damage and ensure safety. The critical first steps involve safely shutting down the unit's power or gas supply, isolating the water flow, and beginning flood mitigation. These actions are not just about stopping the leak; they are about preventing electrical hazards, gas leaks, and extensive water damage that can lead to costly repairs and mold growth.
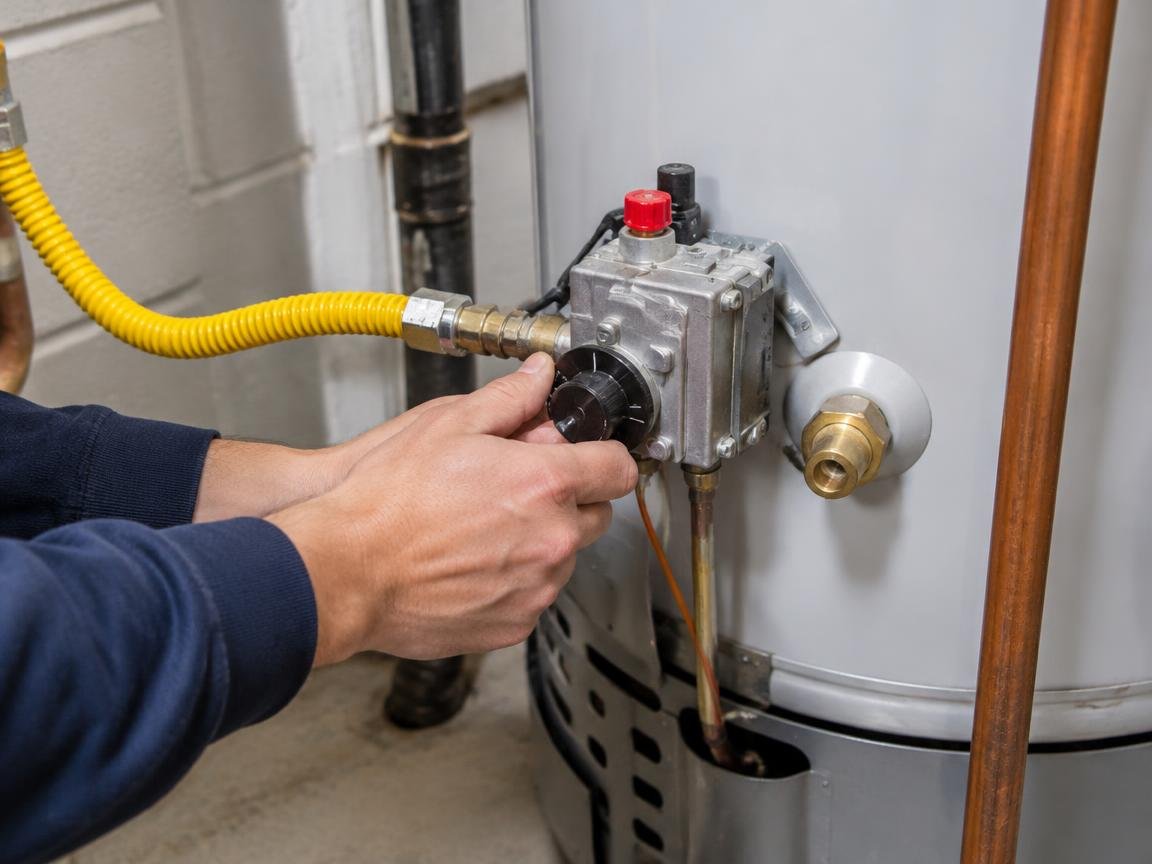
Executing Safe Emergency Plumbing Repairs: Power and Water Shutdown
Before attempting any inspection or repair, safety must be your absolute priority. For electric hot water tanks, locate the dedicated circuit breaker in your home's electrical panel and switch it to the "OFF" position. Electric water heaters typically operate on a 240-volt circuit, often protected by a 30A double-pole breaker. For gas-powered units, turn the gas control knob on the water heater itself to the "OFF" position. If you smell gas, immediately turn off the main gas supply to your home, evacuate the premises, and contact your gas provider from a safe distance. Never attempt to work on a gas appliance if you suspect a gas leak.
Next, you need to stop the water supply to the tank. Locate the cold-water shutoff valve, usually a handle or knob on the pipe leading into the top of your water heater, and turn it clockwise until it's fully closed. This prevents more water from entering the tank. To relieve pressure and begin draining the tank, connect a standard garden hose to the drain valve located near the bottom of the heater and direct the other end to a suitable drainage area, such as a floor drain or outdoors. Open the drain valve and a hot water faucet in your home to allow air into the tank, facilitating drainage. Always wear appropriate personal protective equipment, including gloves and eye protection, when working with plumbing to protect against hot water and potential contaminants.
Distinguishing Tank Condensation from Active Plumbing Leaks
Sometimes, what appears to be a leak is actually condensation. This is a common occurrence, especially during colder months or when a large volume of cold water rapidly enters a warm tank. To differentiate between condensation and an active plumbing leak, perform a simple "dry-and-wait" test. Carefully wipe down the entire exterior of the hot water tank and its surrounding area until it is completely dry. Wait for 15 to 30 minutes, keeping the unit running if possible, and then re-inspect.
If moisture reappears evenly across the tank's surface, particularly on cooler areas or the flue, it's likely condensation. This often happens when humid air comes into contact with the cooler tank exterior or when cold water fills the tank, causing moisture in the air to condense. If, however, you observe a steady drip or stream originating from a specific joint, valve, seam, or fitting, you have an active plumbing leak. For pinpointing the exact source of a subtle leak, a piece of dry paper towel can be invaluable. Gently press it against various connections and seams; any wetness on the paper towel will indicate the leak's origin. Understanding this distinction can save you from unnecessary repairs and help you focus on the real problem.
Diagnosing and Fixing Common Hot Water Tank Leak Locations
Once you've safely secured your hot water tank, the next crucial step is to pinpoint the exact source of the leak. Leaks can originate from various points, and each location often indicates a specific repair strategy. Common culprits include the top plumbing connections, the temperature and pressure relief (TPR) valve, the drain valve, and, in electric models, the heating element gaskets. Identifying the precise location is key to determining whether a DIY fix is feasible or if it's time to call in professionals for comprehensive residential plumbing services.
Repairing Top Inlet and Outlet Plumbing Connections
Leaks from the top of your hot water tank often stem from the cold-water inlet or hot-water outlet connections. These connections typically involve dielectric unions or pipe nipples that connect the tank to your home's plumbing system. Over time, these connections can loosen due to thermal expansion and contraction, or they can corrode, especially if dissimilar metals (like copper pipes connected directly to a steel tank without a dielectric union) cause galvanic corrosion.
To address these leaks, first ensure the water supply to the tank is off and the pressure is relieved. Using two pipe wrenches—one to hold the tank's connection steady and the other to tighten the union or fitting—carefully try to tighten the connection. Avoid over-tightening, which can strip threads or damage pipes. If tightening doesn't resolve the leak, the issue might be corroded threads or a faulty pipe nipple. In such cases, you’ll need to drain the tank, remove the old fitting, clean the threads, apply new PTFE (Teflon) tape and pipe dope to the new fitting, and carefully reassemble. Always use fittings that are compatible with your existing plumbing to prevent future galvanic corrosion.
Fixing Temperature and Pressure Relief (TPR) Valve Leaks
The Temperature and Pressure Relief (TPR) valve is a critical safety device designed to open and release water if the temperature or pressure inside your hot water tank becomes too high, preventing potential explosions. If your TPR valve is leaking, it indicates one of two things: either the valve itself is faulty and needs replacement, or there's an underlying issue causing excessive pressure or temperature in your tank.
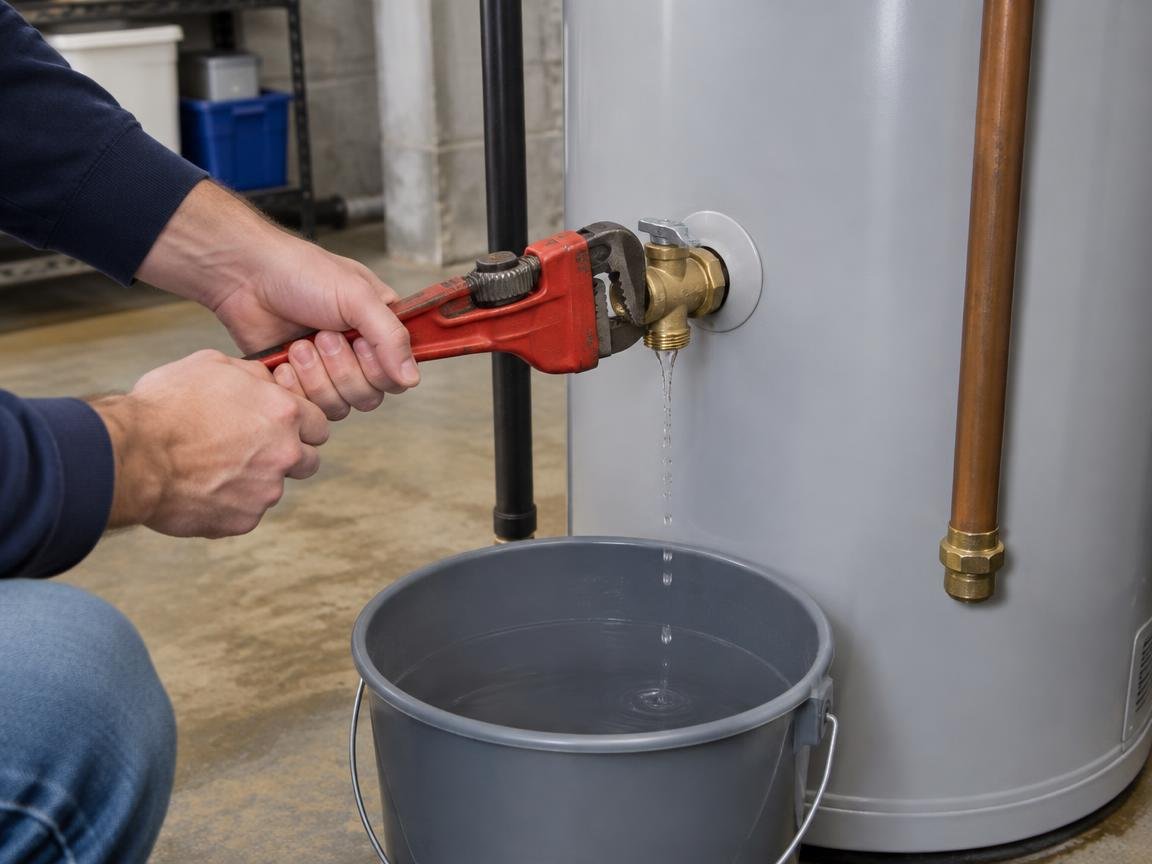
A constant drip or steady stream from the TPR valve's discharge pipe is a clear sign of trouble. Before replacing the valve, ensure your home's water pressure isn't consistently above 80 PSI (pounds per square inch) and that your water heater's thermostat isn't set too high (typically 120-125°F is recommended). If these factors are normal, the valve itself is likely compromised. To replace it, you'll need to shut off the power/gas and water supply, then drain the tank below the level of the TPR valve. Use a pipe wrench to unscrew the old valve, apply PTFE tape and pipe dope to the threads of the new valve, and screw it in securely. Ensure the new valve has the same pressure and temperature ratings as the old one. Never cap or obstruct the TPR valve's discharge pipe, as this defeats its safety purpose. If the new valve also leaks, consult a professional to diagnose potential over-pressure issues, possibly requiring a thermal expansion tank or a pressure-reducing valve for your home's main water line.
Repairing and Upgrading Leaking Drain Valves
The drain valve, located at the bottom of your hot water tank, is used for flushing sediment and draining the tank for maintenance or repairs. These valves are often made of plastic, especially in older or builder-grade models, making them susceptible to cracking, stripping, or simply failing to seal properly over time. A leak from the drain valve can range from a slow drip to a steady stream.
If the leak is from the spout, try tightening the valve handle. If it's leaking from the valve body or threads, a more robust solution is usually required. First, ensure the tank's water supply is off and the tank is depressurized. You'll need to completely drain the tank to replace the valve. Once drained, unscrew the old valve. It's an excellent opportunity to upgrade a plastic valve to a more durable brass drain valve. Before installing the new brass valve, clean the threads thoroughly and apply several wraps of PTFE tape. Screw the new valve in hand-tight, then use a wrench for a final quarter to half-turn to ensure a snug, leak-free seal. This upgrade not only stops the current leak but also provides a more reliable valve for future tank maintenance, such as annual sediment flushing.
Managing Electric Heating Element Gasket Leaks
For electric hot water tanks, another common source of leaks can be the gaskets around the heating elements. Each electric heating element is sealed to the tank with a rubber gasket, and over time, these gaskets can degrade, crack, or lose their elasticity, leading to water seeping out around the element's base.
To address a leaking heating element gasket, you must first turn off the power to the water heater at the circuit breaker and verify it's off with a non-contact voltage tester. Then, shut off the cold-water supply and drain the tank completely below the level of the leaking element. Using an element wrench (a specialized socket wrench), carefully unscrew the heating element. Once removed, inspect the element for damage and replace the old gasket with a new one. Ensure the new gasket is properly seated. Reinsert the heating element, tightening it securely with the element wrench. It's crucial to refill the tank completely with water before restoring power to prevent "dry-firing" the element, which can cause immediate damage. Check for leaks around the newly installed gasket after refilling and repressurizing the tank.
Evaluating System Longevity: Repairing vs Replacing a Leaking Tank
While many leaks can be repaired, there comes a point when the underlying issue signals the end of your hot water tank's useful life. Leaks originating from the tank body itself—such as hairline cracks in the steel lining or widespread internal corrosion—are typically not repairable and indicate a complete system failure. Attempting to patch these types of leaks is often a temporary and unreliable solution, carrying significant risks of catastrophic failure and extensive water damage. Understanding when to repair versus when to replace is crucial for long-term safety, efficiency, and cost-effectiveness.
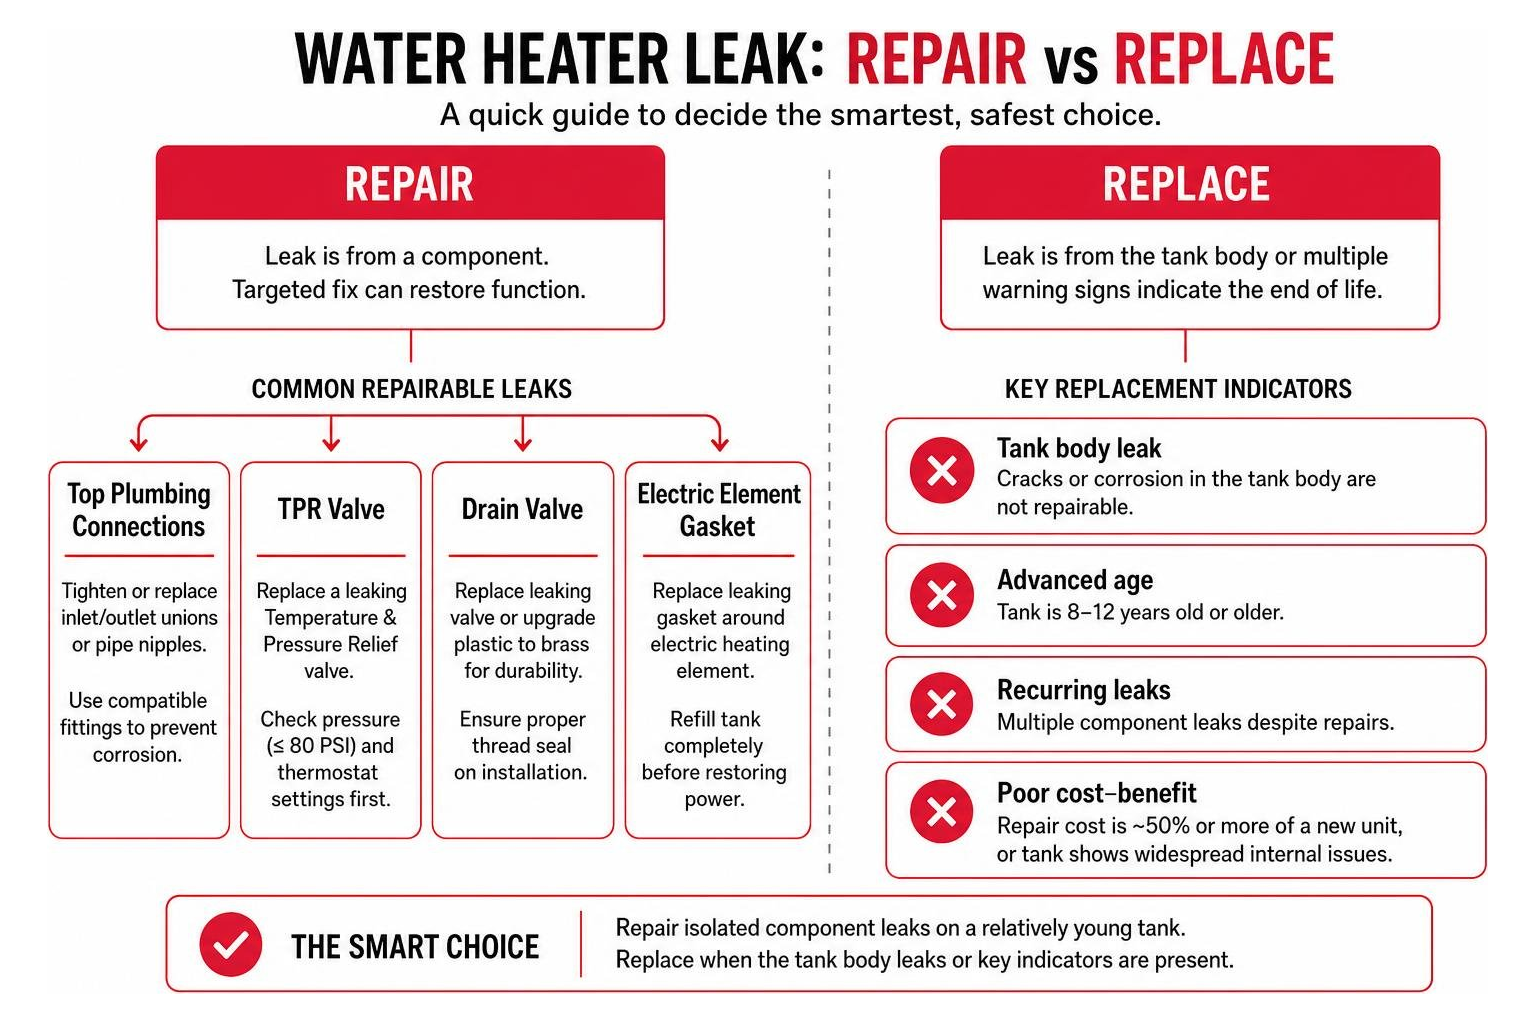
Deciding on Emergency Plumbing Repairs vs Complete Tank Replacement
The decision to repair or replace a leaking hot water tank hinges on several factors, with the age of the unit being a primary consideration. Most conventional tank-style water heaters have a lifespan of 8 to 12 years. If your tank is approaching or has exceeded this age range, and especially if the leak is from the tank body, replacement is almost always the more prudent choice. Older tanks are more prone to internal corrosion, sediment buildup, and diminished efficiency due to a compromised glass lining.
Recurring leaks from different components, despite previous repairs, also signal that the tank is nearing the end of its service life. When calculating the cost-benefit, consider the expense of repeated repairs against the investment in a new, more energy-efficient unit. A new water heater will offer improved performance, lower energy bills, and peace of mind for years to come. If the repair cost approaches 50% or more of the cost of a new unit, or if the tank is showing signs of widespread internal issues, replacement is the recommended course of action.
The Reality of Patching Corroded Water Heater Tanks
For leaks originating from the tank body itself, such as pinholes or small cracks in the steel, homeowners might be tempted to try temporary fixes like epoxy putty or pipe repair clamps. While these methods can temporarily seal a small leak for a few days or weeks, they are never a permanent or safe solution. The internal pressure of a hot water tank, combined with constant thermal expansion and contraction, puts immense stress on any patch. Over time, these temporary seals will inevitably fail, often at the most inconvenient moment, leading to a sudden and potentially severe flood.
The presence of a leak from the tank body indicates that the internal glass lining, designed to protect the steel from corrosion, has been compromised. Once this lining fails, the steel tank is exposed to water, leading to rust and structural weakening. A patch only addresses the symptom, not the underlying cause of the corrosion. Therefore, any leak from the tank itself is a definitive sign that the entire unit needs to be replaced. Prioritizing safety and preventing future water damage means investing in a new water heater when the tank body is compromised.
Preventive Maintenance Strategies to Stop Future Plumbing Leaks
Preventing hot water tank leaks is far more desirable and cost-effective than reacting to them. A proactive approach to maintenance can significantly extend the lifespan of your water heater, maintain its efficiency, and drastically reduce the likelihood of unexpected leaks. Regular inspections and simple maintenance tasks can catch potential issues before they escalate into costly emergencies, ensuring your plumbing system remains reliable for years to come.
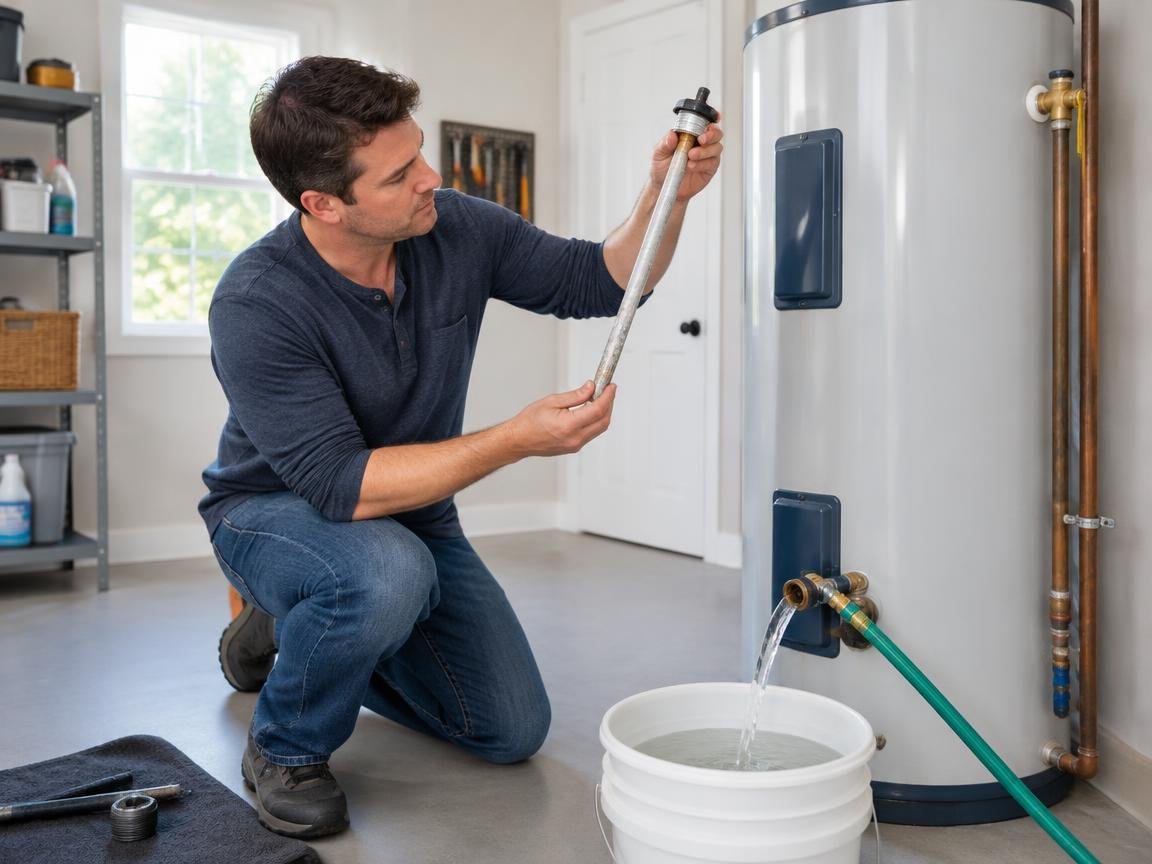
Annual Tank Flushing and Sediment Management
One of the most critical preventive maintenance tasks is annually flushing your hot water tank. Over time, minerals like calcium and magnesium, along with other sediment from your water supply, settle at the bottom of the tank. This sediment layer acts as an insulator, forcing the heating elements (or gas burner) to work harder and longer to heat the water, leading to decreased efficiency, higher energy bills, and accelerated wear on the tank.
More importantly, sediment can cause uneven heating, stress the tank's lining, and even block the drain valve, making future maintenance difficult. To flush your tank, turn off the cold-water supply and power/gas to the unit. Connect a garden hose to the drain valve and direct it to a suitable drain. Open the drain valve and a nearby hot water faucet to allow air in. Let the tank drain completely, then open the cold-water supply for a few minutes to stir up any remaining sediment, allowing it to flush out. Repeat this process until the water running from the hose is clear. This simple annual task can add years to your water heater's life and prevent many common leak issues.
Sacrificial Anode Rod Inspection and Replacement
The sacrificial anode rod is your hot water tank's primary defense against corrosion. Made typically of magnesium, aluminum, or zinc, this rod is designed to corrode instead of the steel tank lining. It attracts corrosive elements in the water, effectively sacrificing itself to protect the tank. Over time, the anode rod depletes, losing its protective capabilities.
We recommend inspecting your anode rod every 3 to 5 years, or more frequently in areas with hard water. To inspect it, you'll need to turn off the cold-water supply, relieve tank pressure, and partially drain the tank (just enough to be below the anode rod's port, usually at the top of the tank). Use a socket wrench to unscrew and remove the rod. If it's heavily corroded, less than half its original thickness, or completely eaten away to the core wire, it's time for a replacement. Replacing a depleted anode rod is a relatively inexpensive way to significantly extend the life of your water heater and prevent leaks caused by tank corrosion.
Managing Thermal Expansion and High Household Water Pressure
Excessive water pressure and thermal expansion are silent killers of hot water tanks and plumbing systems. High incoming water pressure (above 60 PSI) constantly stresses pipes, fittings, and appliances, leading to premature failure and leaks. Thermal expansion occurs in closed-loop plumbing systems (common when a backflow preventer or pressure-reducing valve is installed on the main water line) when heated water has no place to expand, causing pressure inside the tank to rise significantly. This can lead to intermittent TPR valve leaks, micro-fractures in the tank, and stress on all plumbing connections.
To mitigate these issues, first, test your home's water pressure with a pressure gauge. If it consistently exceeds 60 PSI, consider installing a pressure-reducing valve on your main water line. For thermal expansion, installing a thermal expansion tank near your water heater is crucial. This tank provides a cushion for the expanding water, absorbing the pressure spikes and protecting your water heater and plumbing system from undue stress. These measures are vital for preventing pressure-related leaks and extending the life of your entire plumbing infrastructure.
Frequently Asked Questions About Hot Water Tank Leaks
Why is my TPR valve leaking intermittently?
An intermittently leaking Temperature and Pressure Relief (TPR) valve is a common issue that often points to underlying pressure or temperature problems within your hot water system. The valve is designed to open when either the water temperature exceeds 210°F (99°C) or the pressure inside the tank exceeds its set limit, usually 150 PSI. If it leaks only occasionally, it's typically due to thermal expansion. In a closed-loop plumbing system (where water cannot flow back into the main supply due to a check valve or pressure-reducing valve), heating water causes it to expand, increasing pressure within the tank. If there's no expansion tank to absorb this pressure, it can build up enough to briefly open the TPR valve. Other causes include a faulty valve that needs replacement, or a thermostat set too high, leading to excessive water temperatures.
What tools and materials are needed for DIY water heater leak repairs?
For common DIY hot water tank leak repairs, having a basic set of tools and materials on hand will be invaluable. We recommend the following:
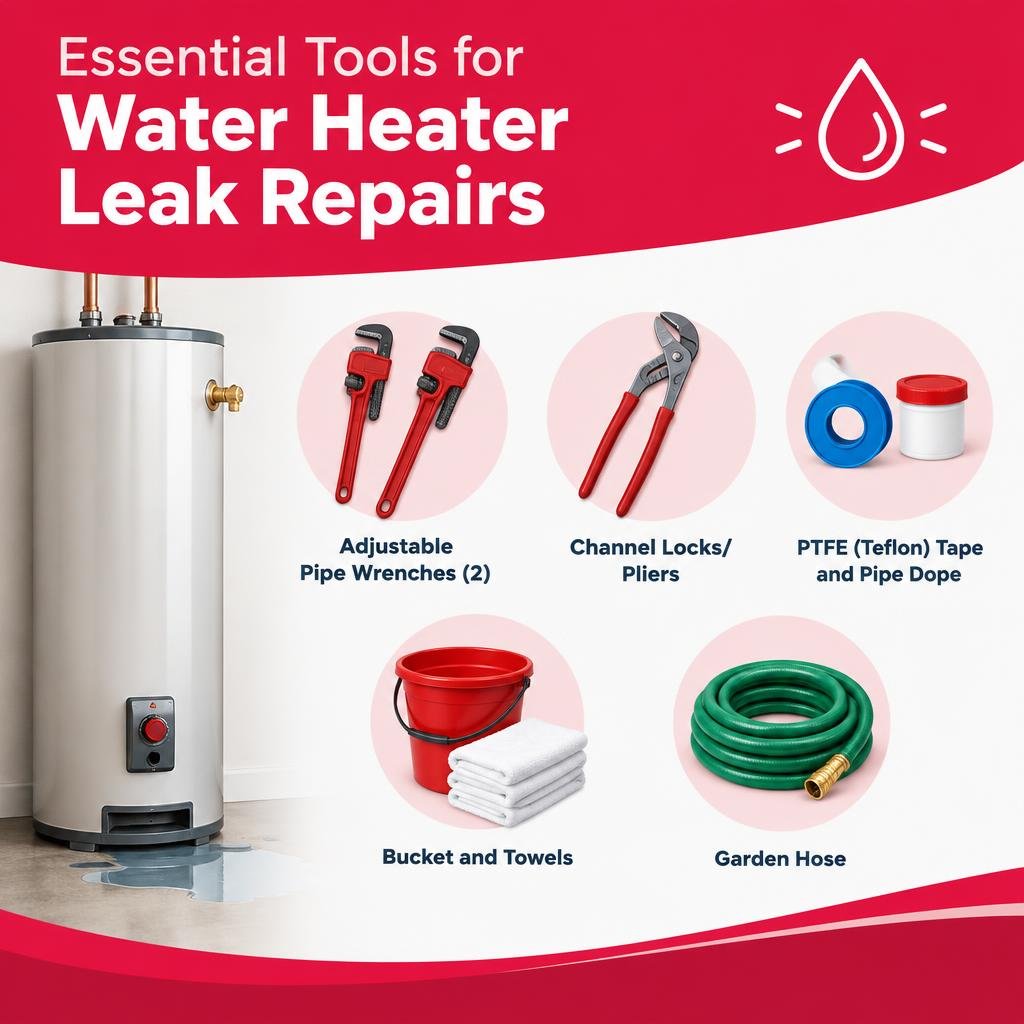
- Adjustable Pipe Wrenches (2): Essential for tightening or loosening pipe connections and valves.
- Channel Locks/Pliers: Useful for smaller fittings and general gripping.
- PTFE (Teflon) Tape and Pipe Dope: For sealing threaded connections and preventing leaks.
- Bucket and Towels: For catching water during repairs and cleanup.
- Garden Hose: For draining the tank.
- Flashlight: To illuminate dark areas around the tank.
- Personal Protective Equipment (PPE): Gloves and safety glasses are crucial.
- Voltage Tester (for electric heaters): To confirm power is off.
- Replacement Parts: Such as a new TPR valve, drain valve (preferably brass), or pipe nipples, depending on the leak source.
- Screwdrivers: For various fasteners.
How much does it cost to repair a water heater leak versus replacing the unit?
The cost to address a hot water tank leak varies significantly based on the source of the leak and whether you opt for DIY repair or professional service. For simple DIY fixes like tightening a loose connection or replacing a drain valve, parts might cost $20-$60. If you replace a TPR valve yourself, the valve itself typically runs $25-$50. Professional labor for these types of valve replacements can add $150-$300, bringing the total to $175-$350.
However, if the leak originates from the tank body, repair is not an option, and full replacement is necessary. The cost of a new conventional tank-style water heater ranges from $500 to $1,500 for the unit itself, with professional installation adding another $500 to $1,000, bringing the total replacement cost to $1,000-$2,500. High-efficiency or tankless models can cost considerably more. When deciding, compare the repair cost against the price of a new unit, considering the age of your existing heater and potential efficiency gains from a modern replacement.
Conclusion
Addressing a hot water tank leak promptly and effectively is crucial for protecting your home and ensuring your family's safety. By understanding the common causes, knowing how to identify the leak source, and taking immediate shutdown steps, you can mitigate damage and make informed decisions. While many minor leaks can be resolved with DIY repairs, recognizing when to call a professional for more complex issues or full unit replacement is equally important. Proactive maintenance—including annual flushing, anode rod inspection, and managing water pressure—is your best defense against future leaks, ensuring long-term plumbing reliability and consistent hot water for your home.

Osaka quantum-physics postdoc now freelancing from Lisbon’s azulejo-lined alleys. Kaito unpacks quantum sensing gadgets, fado lyric meanings, and Japanese streetwear economics. He breakdances at sunrise on Praça do Comércio and road-tests productivity apps without mercy.
